(How to buy and sell Ethereum in Canada )
STEP 1: What The Heck Is An Ethereum Wallet ?
“What the heck is a crypto wallet?!” is what you’re probably asking yourself right now (No, it’s not the leather wallet your dad carried in his back pocket). An Ethereum wallet can be simply described as your personal bank account to hold your Ethereum; it can be downloaded on your computer or cell phone and does not require you to apply like a bank would. You download the file, follow the simple setup instructions and you’re ready to go. It’s that simple. However, unlike a bank you are in charge of your wallet and there is no recourse if anything goes wrong.
You must ensure your computer is free of viruses and you write down your backup code. Every wallet has a backup portion which gives you a randomly generated 12 word phrase. You should write this down and keep it somewhere VERY safe. This is the only way you can recover your coins if your computers dies or something else causes you to lose your Ethereum. Do not take my warning lightly!
There is many wallets you can download but for the purpose of keeping things we simple, we will give you two recommendations:
Jaxx Wallet – Mobile support and desktop (Windows or Mac) , can sync between platforms (view your wallet on your computer and cell phone) , potential security risk using this wallet so please back up carefully.
Exodus (Recommended)– Can only be installed on PC/Mac , most secure wallet currently, ability to exchange Ethereum into other currencies on the fly.
For the purpose of this guide we will discuss setting up the Exodus wallet. Jaxx has a similar setup, so you can apply this knowledge to both.
STEP 2: Setting Up Your Ethereum Wallet
After you have installed Exodus on your computer after you open it up for the first time you should see the following screen:
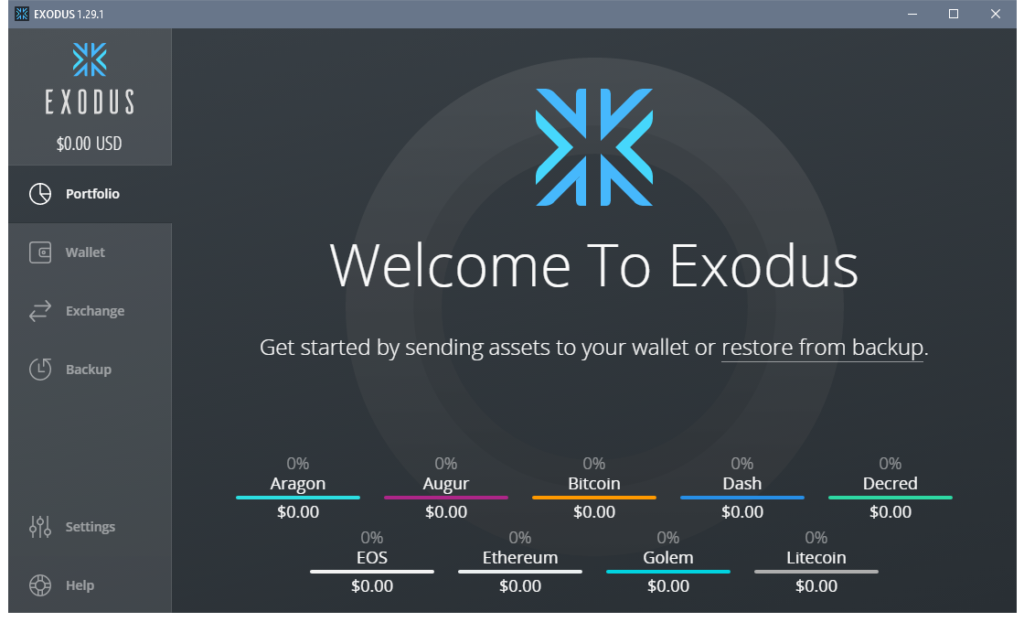
This is your home screen for your wallet. Exodus is quite intuitive and is easy to use but the concept of running your own “bank account” can be daunting. After you are done reading this guide, those fears will be long gone ! Exodus also holds a variety of other Crypto Currencies which follow the same steps as Ethereum is you choose to venture down that path.
On the side bar you will see various functions you can use and for the next step we are going to click wallet. Once you see this screen click receive and you should see a code that looks something like this 0xE2f05C96678173206cfbA46F346D5B42F5442C18 .
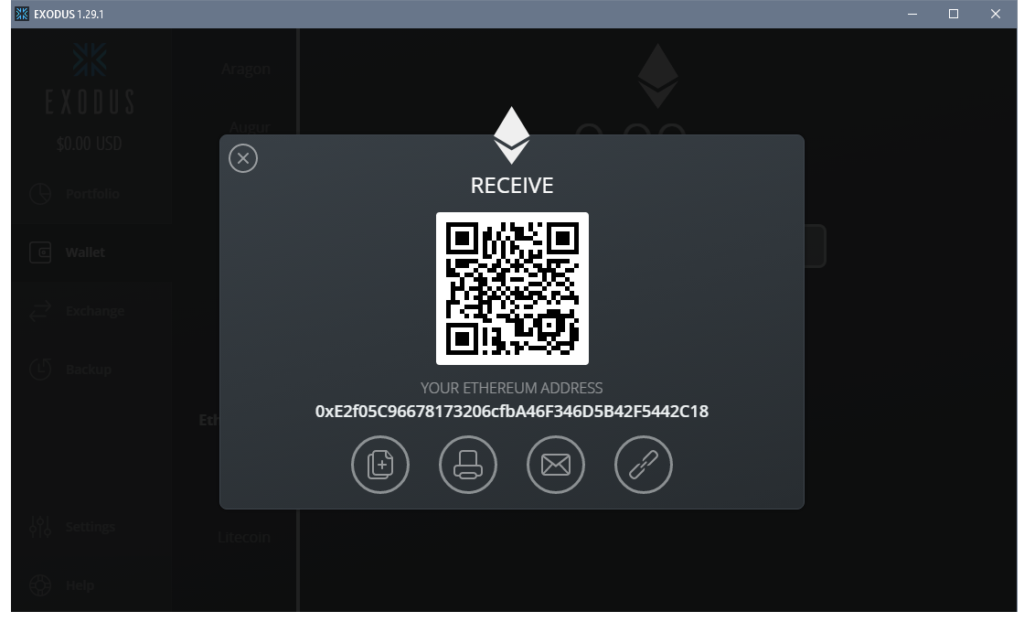
This code is the how you accept Ethereum and is called your wallet address. This key can be shared with friends or people you want to receive Ethereum from. You can receive coins by having the sender scan the QR code as well which all wallets now support (This is much easier than typing out a long wallet address by hand) .
This is your gateway for all payments and is the address you will send your first Ethereum from Coinbase to. The send button allows you send coins to other peoples addresses like yours or to an exchange if you decide to cash our your Ethereum for Canadian Dollars (we will touch on exchanges and how to buy coins in the next step)
STEP 3: Buying Your First Ethereum Coin
We are now at the most fun and exciting step, buying your first Ethereum coin ! There is plenty of exchanges you can use to buy coins but we are going to use Coinbase as our exchange of choice. They are the most popular exchange and have excellent customer support. In order to buy coins you need to add your credit card and optionally some form of government ID.
All exchanges will ask you for some form of ID when buying any crypto currency, however if you aren’t comfortable with that you can buy $100 CAD per week of Ethereum without uploading government ID. If you upload a document such as a passport they will bump you to $200 and will slowly increase that amount as you build trust with Coinbase . They will eventually increase that limit to $1000 CAD per week after you are an established trustworthy buyer. After you have created an account you will see the following home screen.
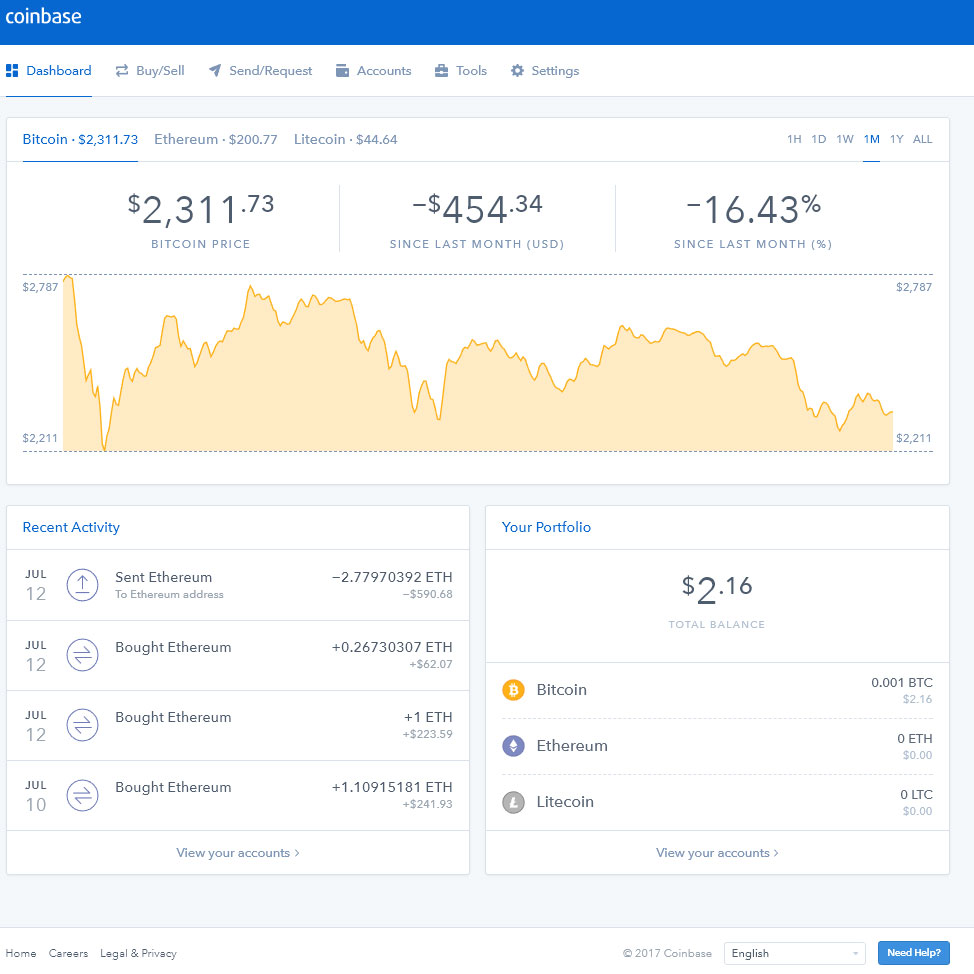
This shows the current price of various coins, your purchased/sell history and the current balance you are holding on Coinbase . That brings us to our first security tip: NEVER LEAVE COINS ON AN EXCHANGE ! Coinbase is group of great people but you don’t want anyone but yourself holding your coins because an exchange is more likely to be cyber attacked than you are; if an exchange loses your coins, there is no guarantee they will replace them.
In the next step you are going to create another wallet which is store inside of Coinbase . This is very simple and is essentially a two click setup. When you buy coins, they will initially be stored here (on the exchange) until you send them to the wallet you setup in Step 1. Click the Accounts tab featured in the above screenshot.
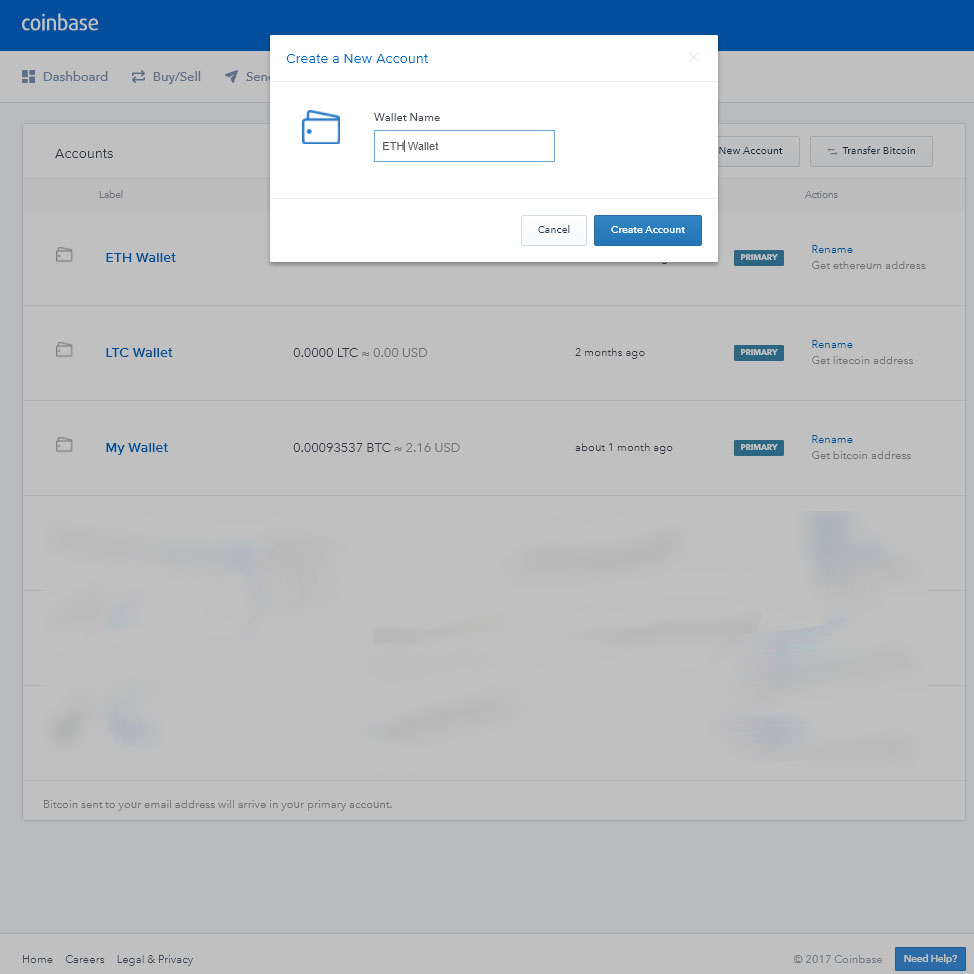
Now that you are in the accounts tab, click New Account, Select Wallet and then name it ETH Wallet. Voila ! Coinbase wallet setup complete.
Your next step is to click the buy tab and you are about to purchase your first coin ! Start with something small ($100 is a good starting point for most new investors) just to feel comfortable with the process.
STEP 4: Transferring from Coinbase To Your Wallet
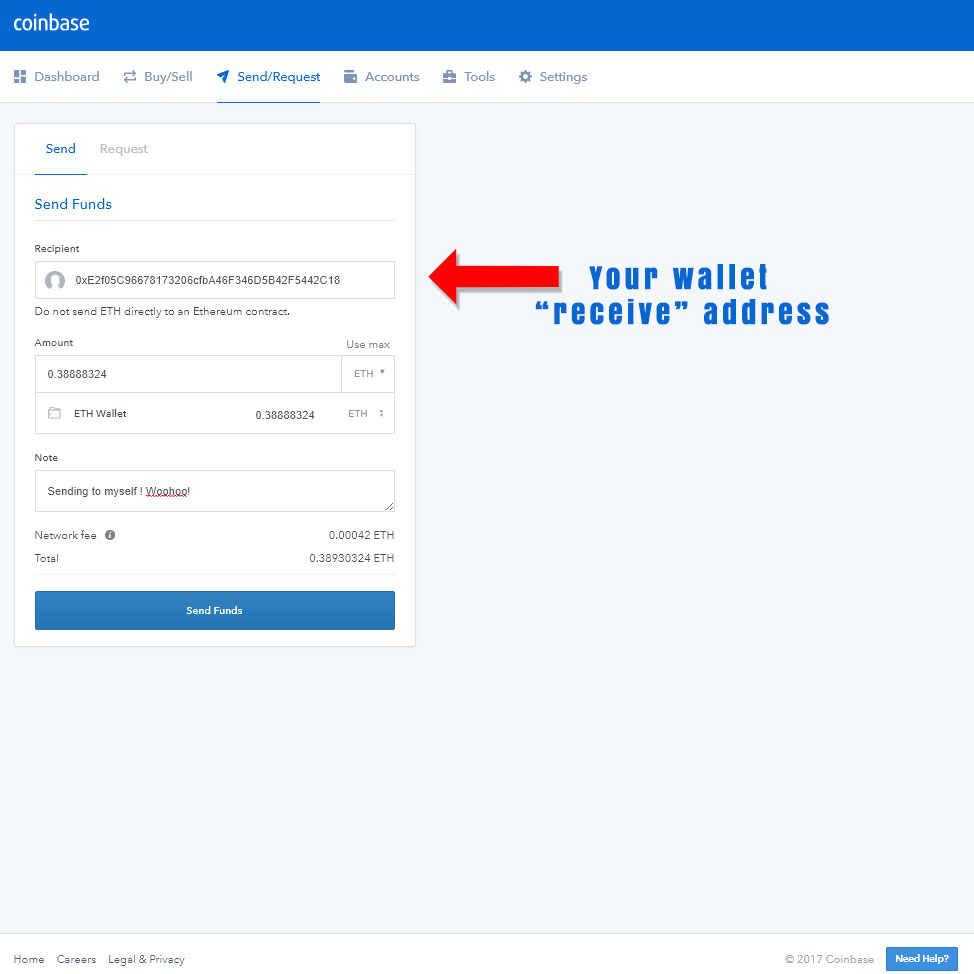
This is the send screen, I have filled out the amount of Ethereum I want to send to myself with the wallet receive address that we created earlier in the guide. I have filled out that address of my Exodus wallet in the Recipient section and selected my wallet with the drop down that we just created and hit send. You have now successful bought Ethereum and have sent it to the wallet you have created. This has take up 24 hours to complete sometimes so be patient (sending coins from one wallet to another is instant, but the exchanges can be slow due to increased popularity of the coin). You are now done ! Open your wallet in a few hours and see your coins deposit … CHA CHING!

Recent Comments